Hairspring Week: Vibrating the Spring
Hairsprings are anything but a plug-and-play solution from the factory.
The poising process in the previous installment of this how-to makes fitting a hairspring more complicated, since poising removes material from the balance wheel, altering its mass. If all balance wheels had the same mass, hairsprings could be standardized. As it is, however, they have to be individually vibrated and fitted.
This is another process that I've previously documented, but again, this time I have more pictures and details.

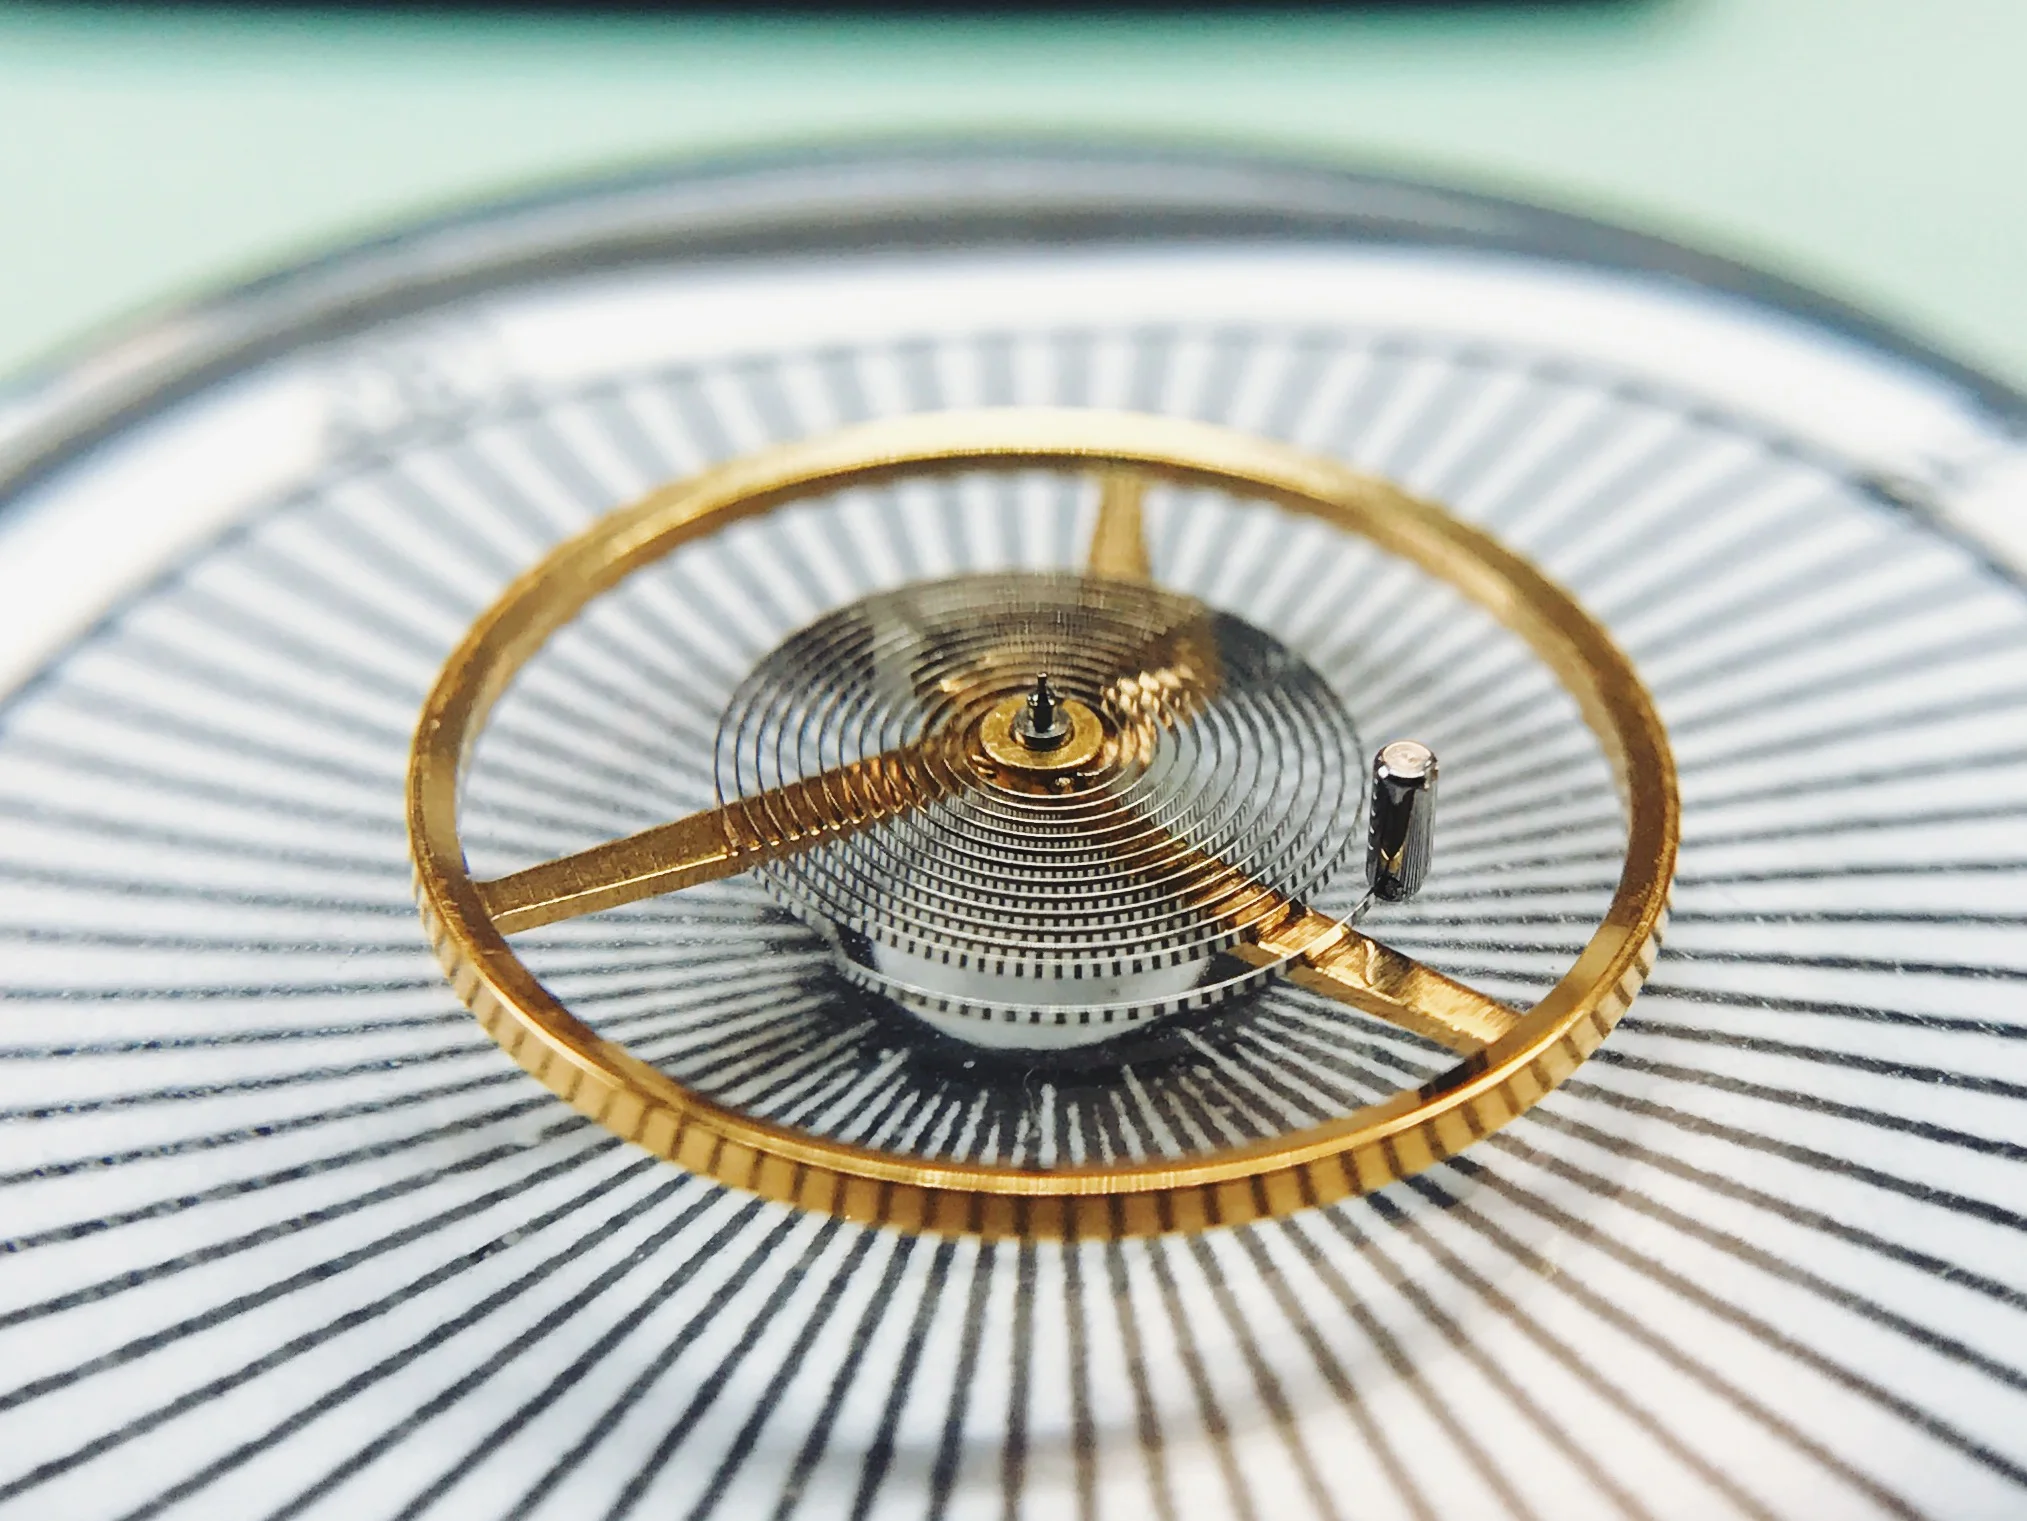
The hairspring attaches to a collet, which friction fits to the balance staff. The hairspring and collet are connected by a pin, but that won't be installed until later in the process. First, we have to break off the tongue at the inside end of the spring. Just bend it back and forth a few times with a tweezer and it'll snap off!
The inside coil of the spring fits snugly enough against the collet to mount it to the balance wheel and find the vibrating point.

That said, it's not permanently attached, so rough handling can cause them to separate and mess up your work. Be careful!
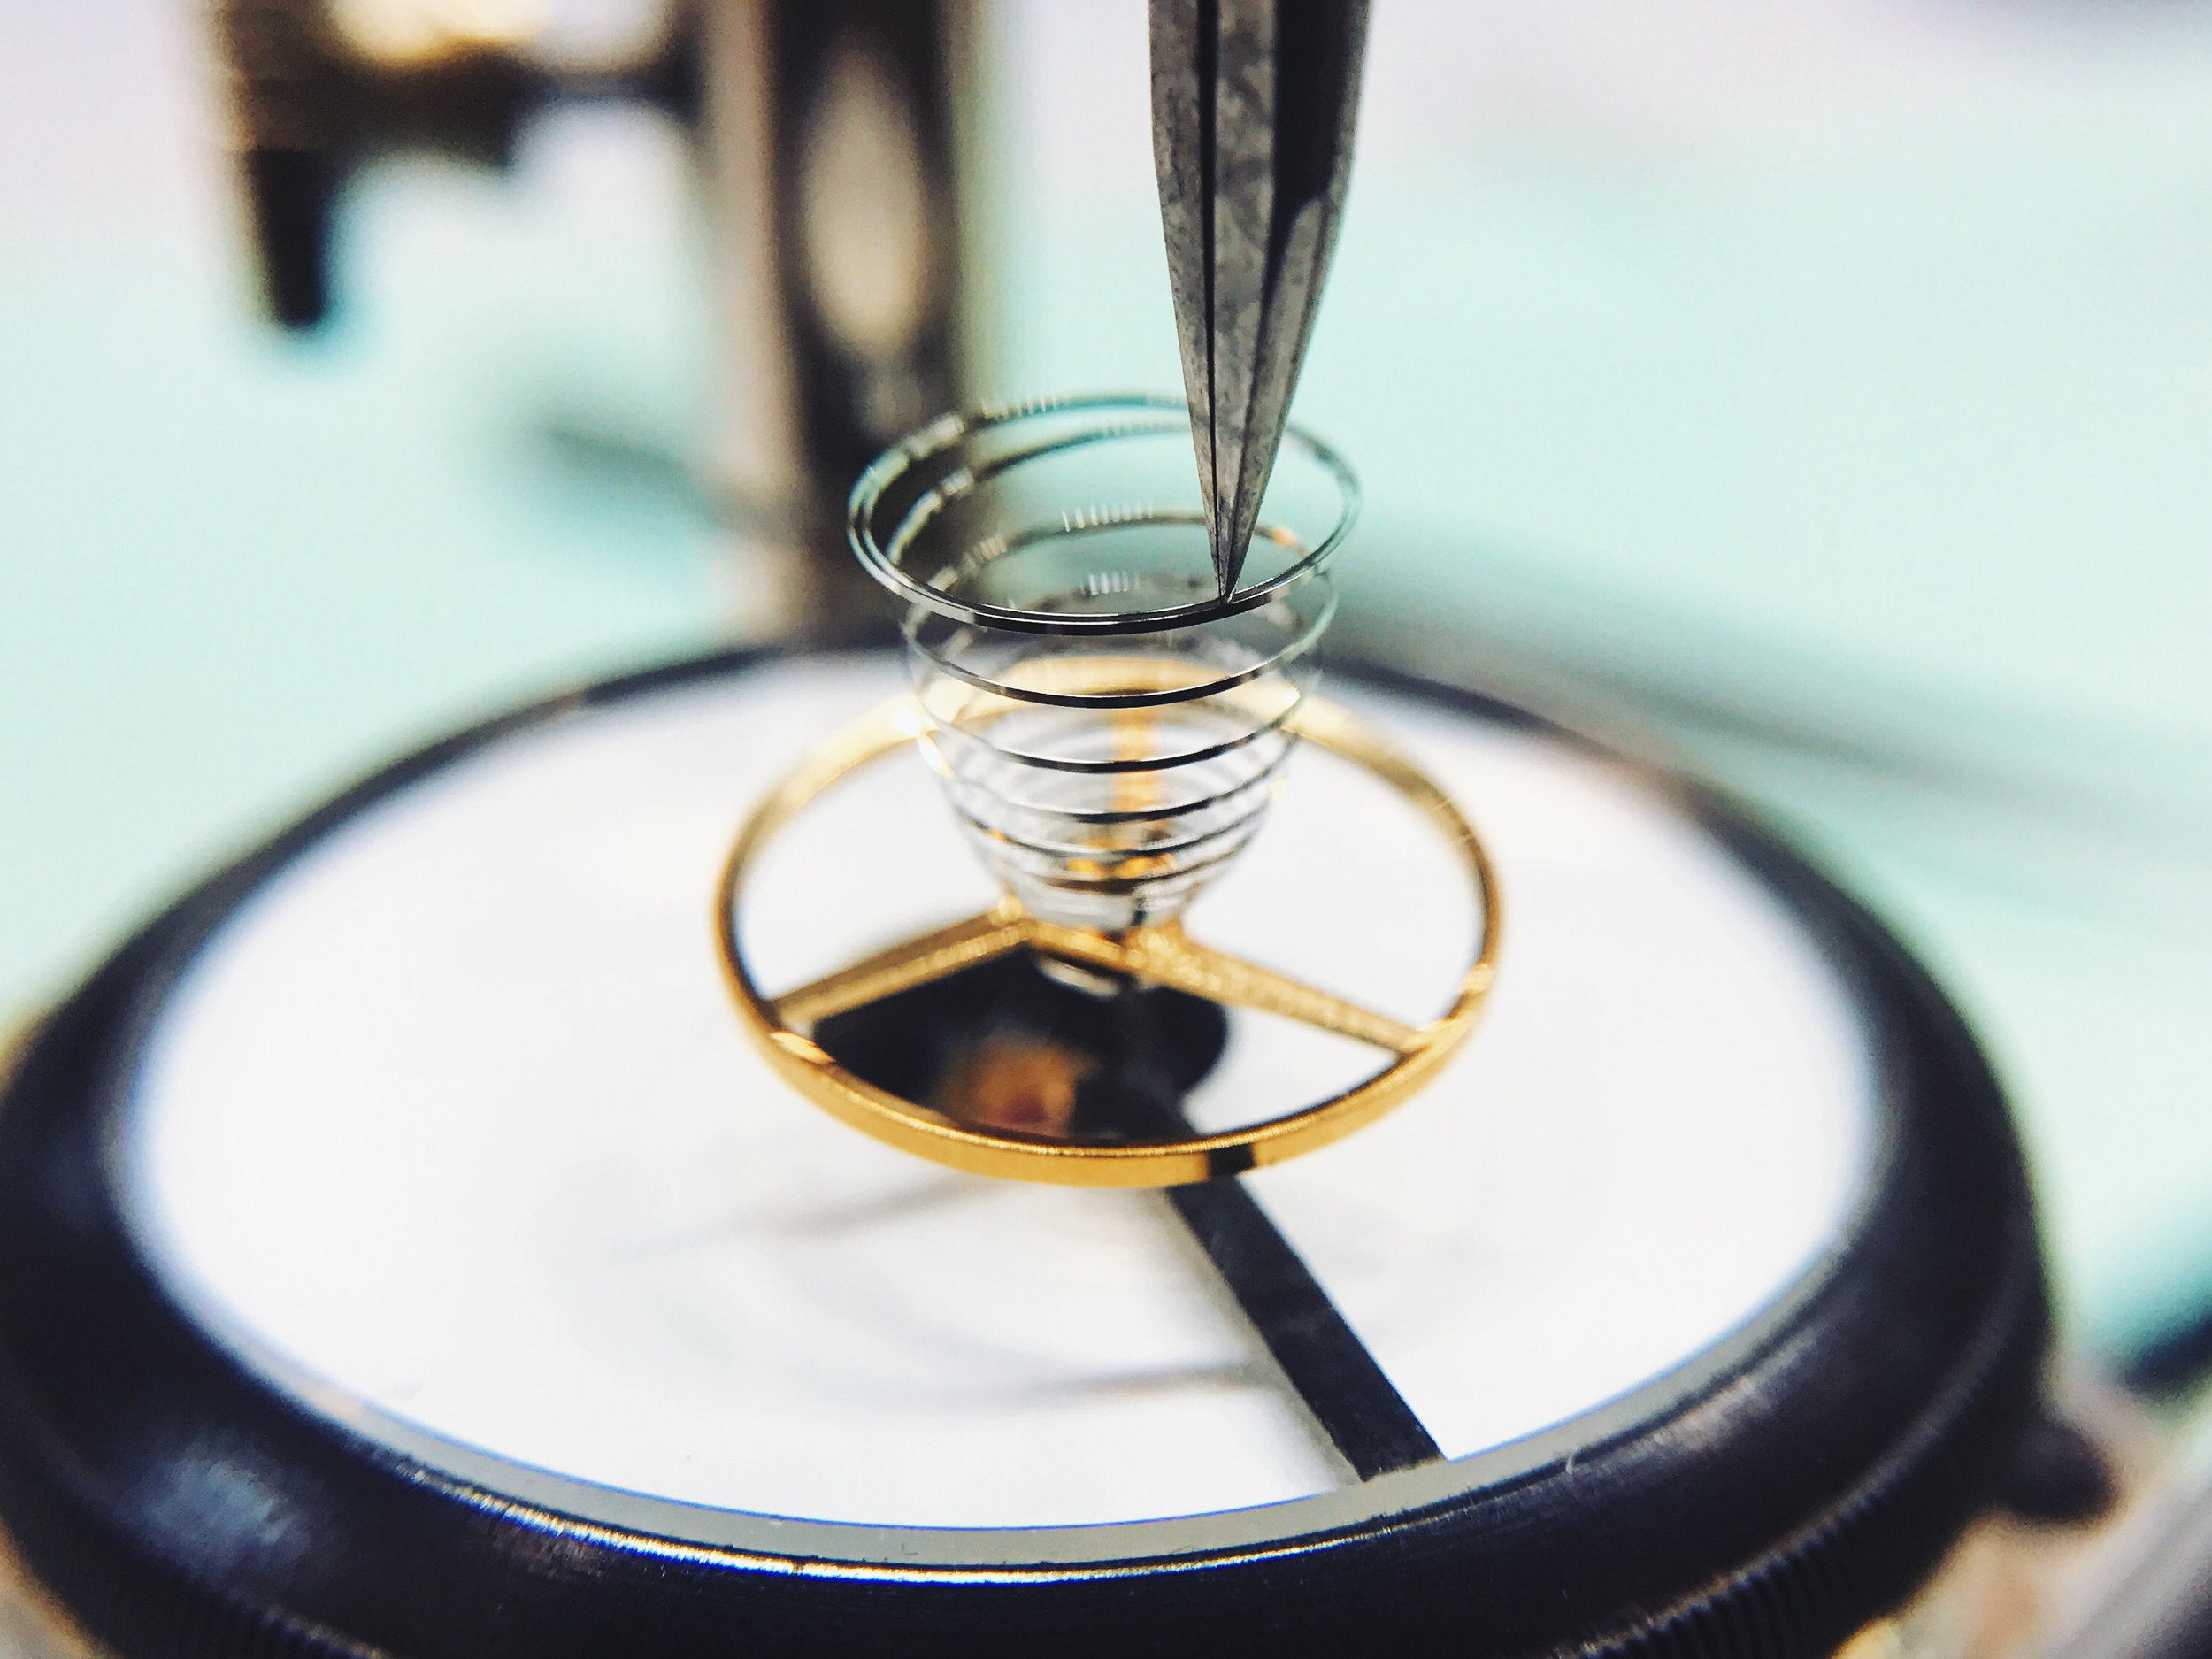
The vibrating tool is a delicate yet simple device that allows you to find the exact point on the hairspring that vibrates at the right frequency.

It's essentially just an articulated clamp that hangs above a balance wheel that has been perfectly calibrated to an exact frequency. A lever on the side allows you to rotate the tool, spinning both wheels together. Their relative speeds will allow you to determine which way to move the spring to find the vibrating point.

Too slow.
The speed differential can be difficult to see, and it takes practice to get right. The nice thing is that it's super obvious when you've hit the vibration point right on the head—the wheels just vibrate at the same rate without any variation.

That's more like it!
After the vibration point is determined, cut the spring 360° away to "mark" the spot. Now it's time to find the pinning point.
There's a particular formula for finding the pinning point, which was derived years ago by Pierre LeRoy, and accounts for inherent timing issues in watch positions. First, find the point where the spring last breaks away from the collet, and find the clockwise angle to the vibrating point. Then multiply that angle by (4x/3)-60° and remove that amount counterclockwise from the breakaway point.
Yeah.
It sounds complicated, but the formula simply places the pinning point in-line with the vibrating point, while allowing for enough spring to form the "tongue" that is pinned into the collet (that's the subtracted 60° in the calculation).

Enough math. Let's get to work! Break off the inside of the spring according to the formula by forming a tight bend at the cutting point and wiggling it back and forth, just like earlier. A 60° portion has to be gently bent inwards to allow the spring to be pinned properly.
The collet is small, but it fits on our tiniest smoothing broaches. Fit the tongue into the collet's hole, and insert the thin end of the taper pin into place.

The pin can be easily thinned by rolling it on something hard (a steel riveting block works wonderfully) with the end of a tweezer. Getting the pin in can be nightmarishly vexing at first, but it get better with practice.

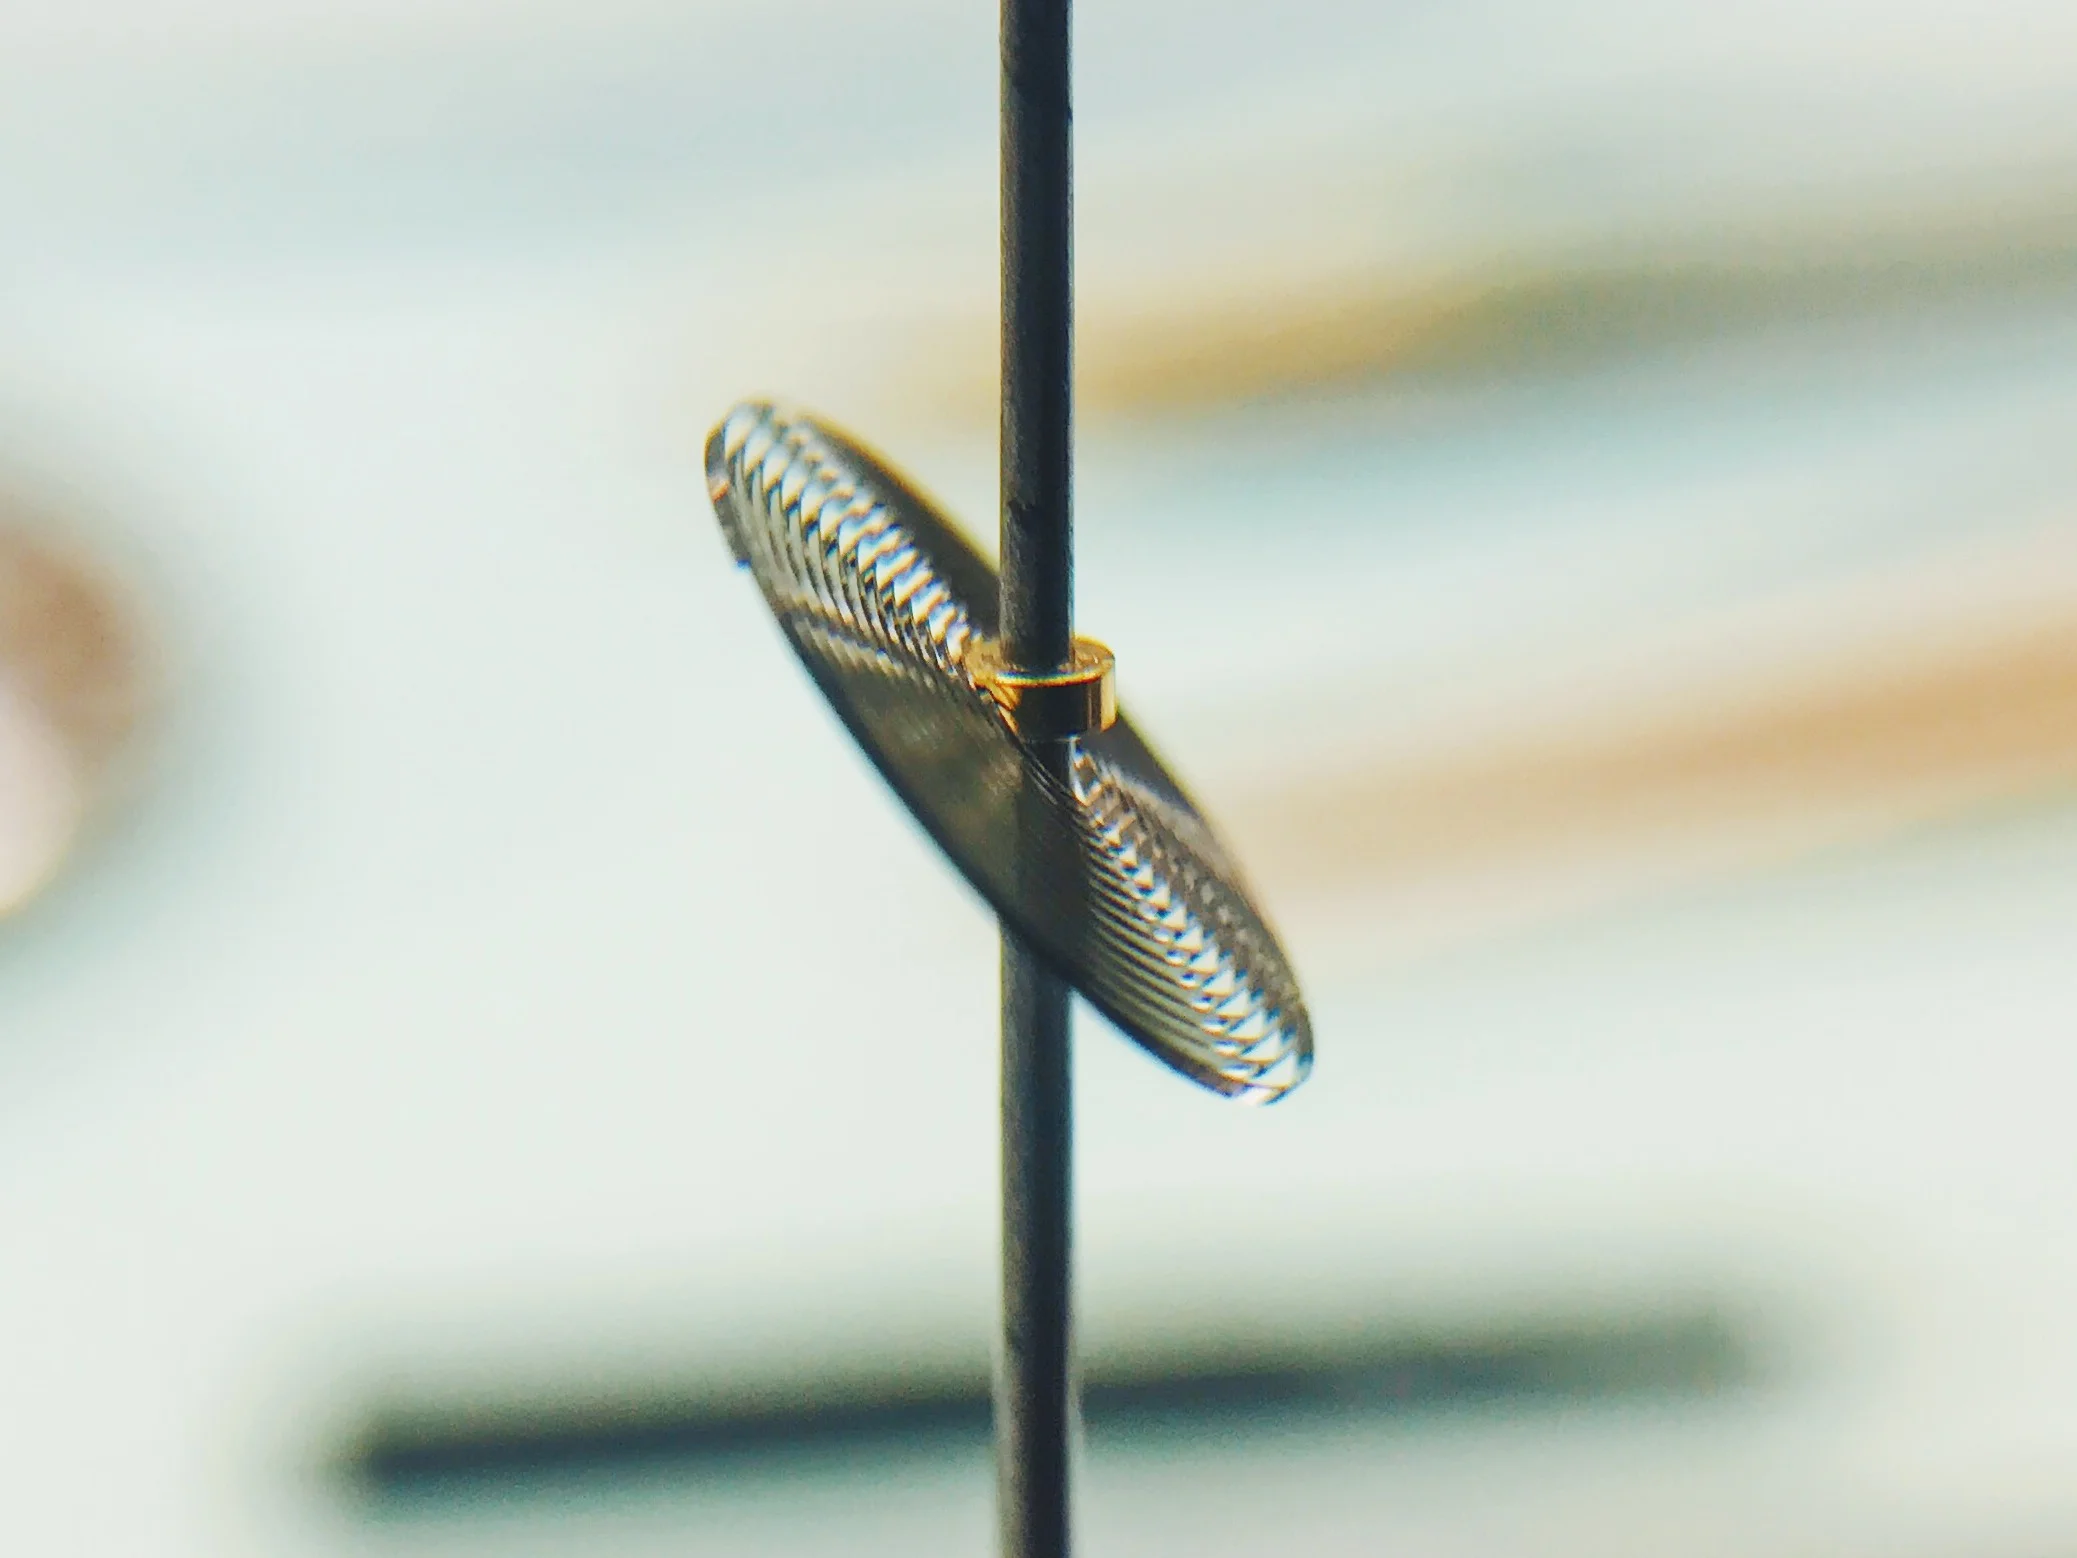
Pinned, before centering and flattening.
This is the really tricky part. The pin has to be pushed tightly into the hole, but it doesn't like being forced. This pin is soft brass and it's absurdly thin, which means that it will bend at the first chance it gets. The solution is simple, yet incredibly difficult: just push it in perfectly straight. Once the pin is in there tightly, break or cut off the ends of the pin and break out the tweezers—it's time to start truing.
Truing is essentially the main challenge for the rest of the process. The spring has to come off the collet with no angle up or down, and the collet has to be perfectly centered to the spring spiral. Very gentle, yet firm tweezer work is required from here on out. True the spring as best you can while it's off the balance wheel, since it's going to be easier now than when it's mounted.

The next tool in our arsenal is the hairspring truing caliper. This is a simpler tool, which simply holds the balance wheel by its pivots and allows you to spin it to see any wobbles in the hairspring.
A perfect hairspring is hard to describe, besides the irritating admonishing that you'll know it when you see it. A spinning hairspring shouldn't wobble, shimmy or tremble. It should be a perfectly flat spiral that spins concentrically to its pivots.

This isn't a perfect hairspring. Look closely and you can see both centering problems (a side-to-side wobble) and a flatness problem (up and down). It'll take more tweezer work to correct.

Not perfect, but good enough to move on to the next steps. Time to form the endcurve and attach the stud, and then it'll be time to get it in the watch!
Watchmaking student at the Lititz Watch Technicum, formerly a radio and TV newswriter in Chicago.