Micromechanics: Stems

Our last micromechanics grade, and final project for our first year, is making a winding stem for our school watch.
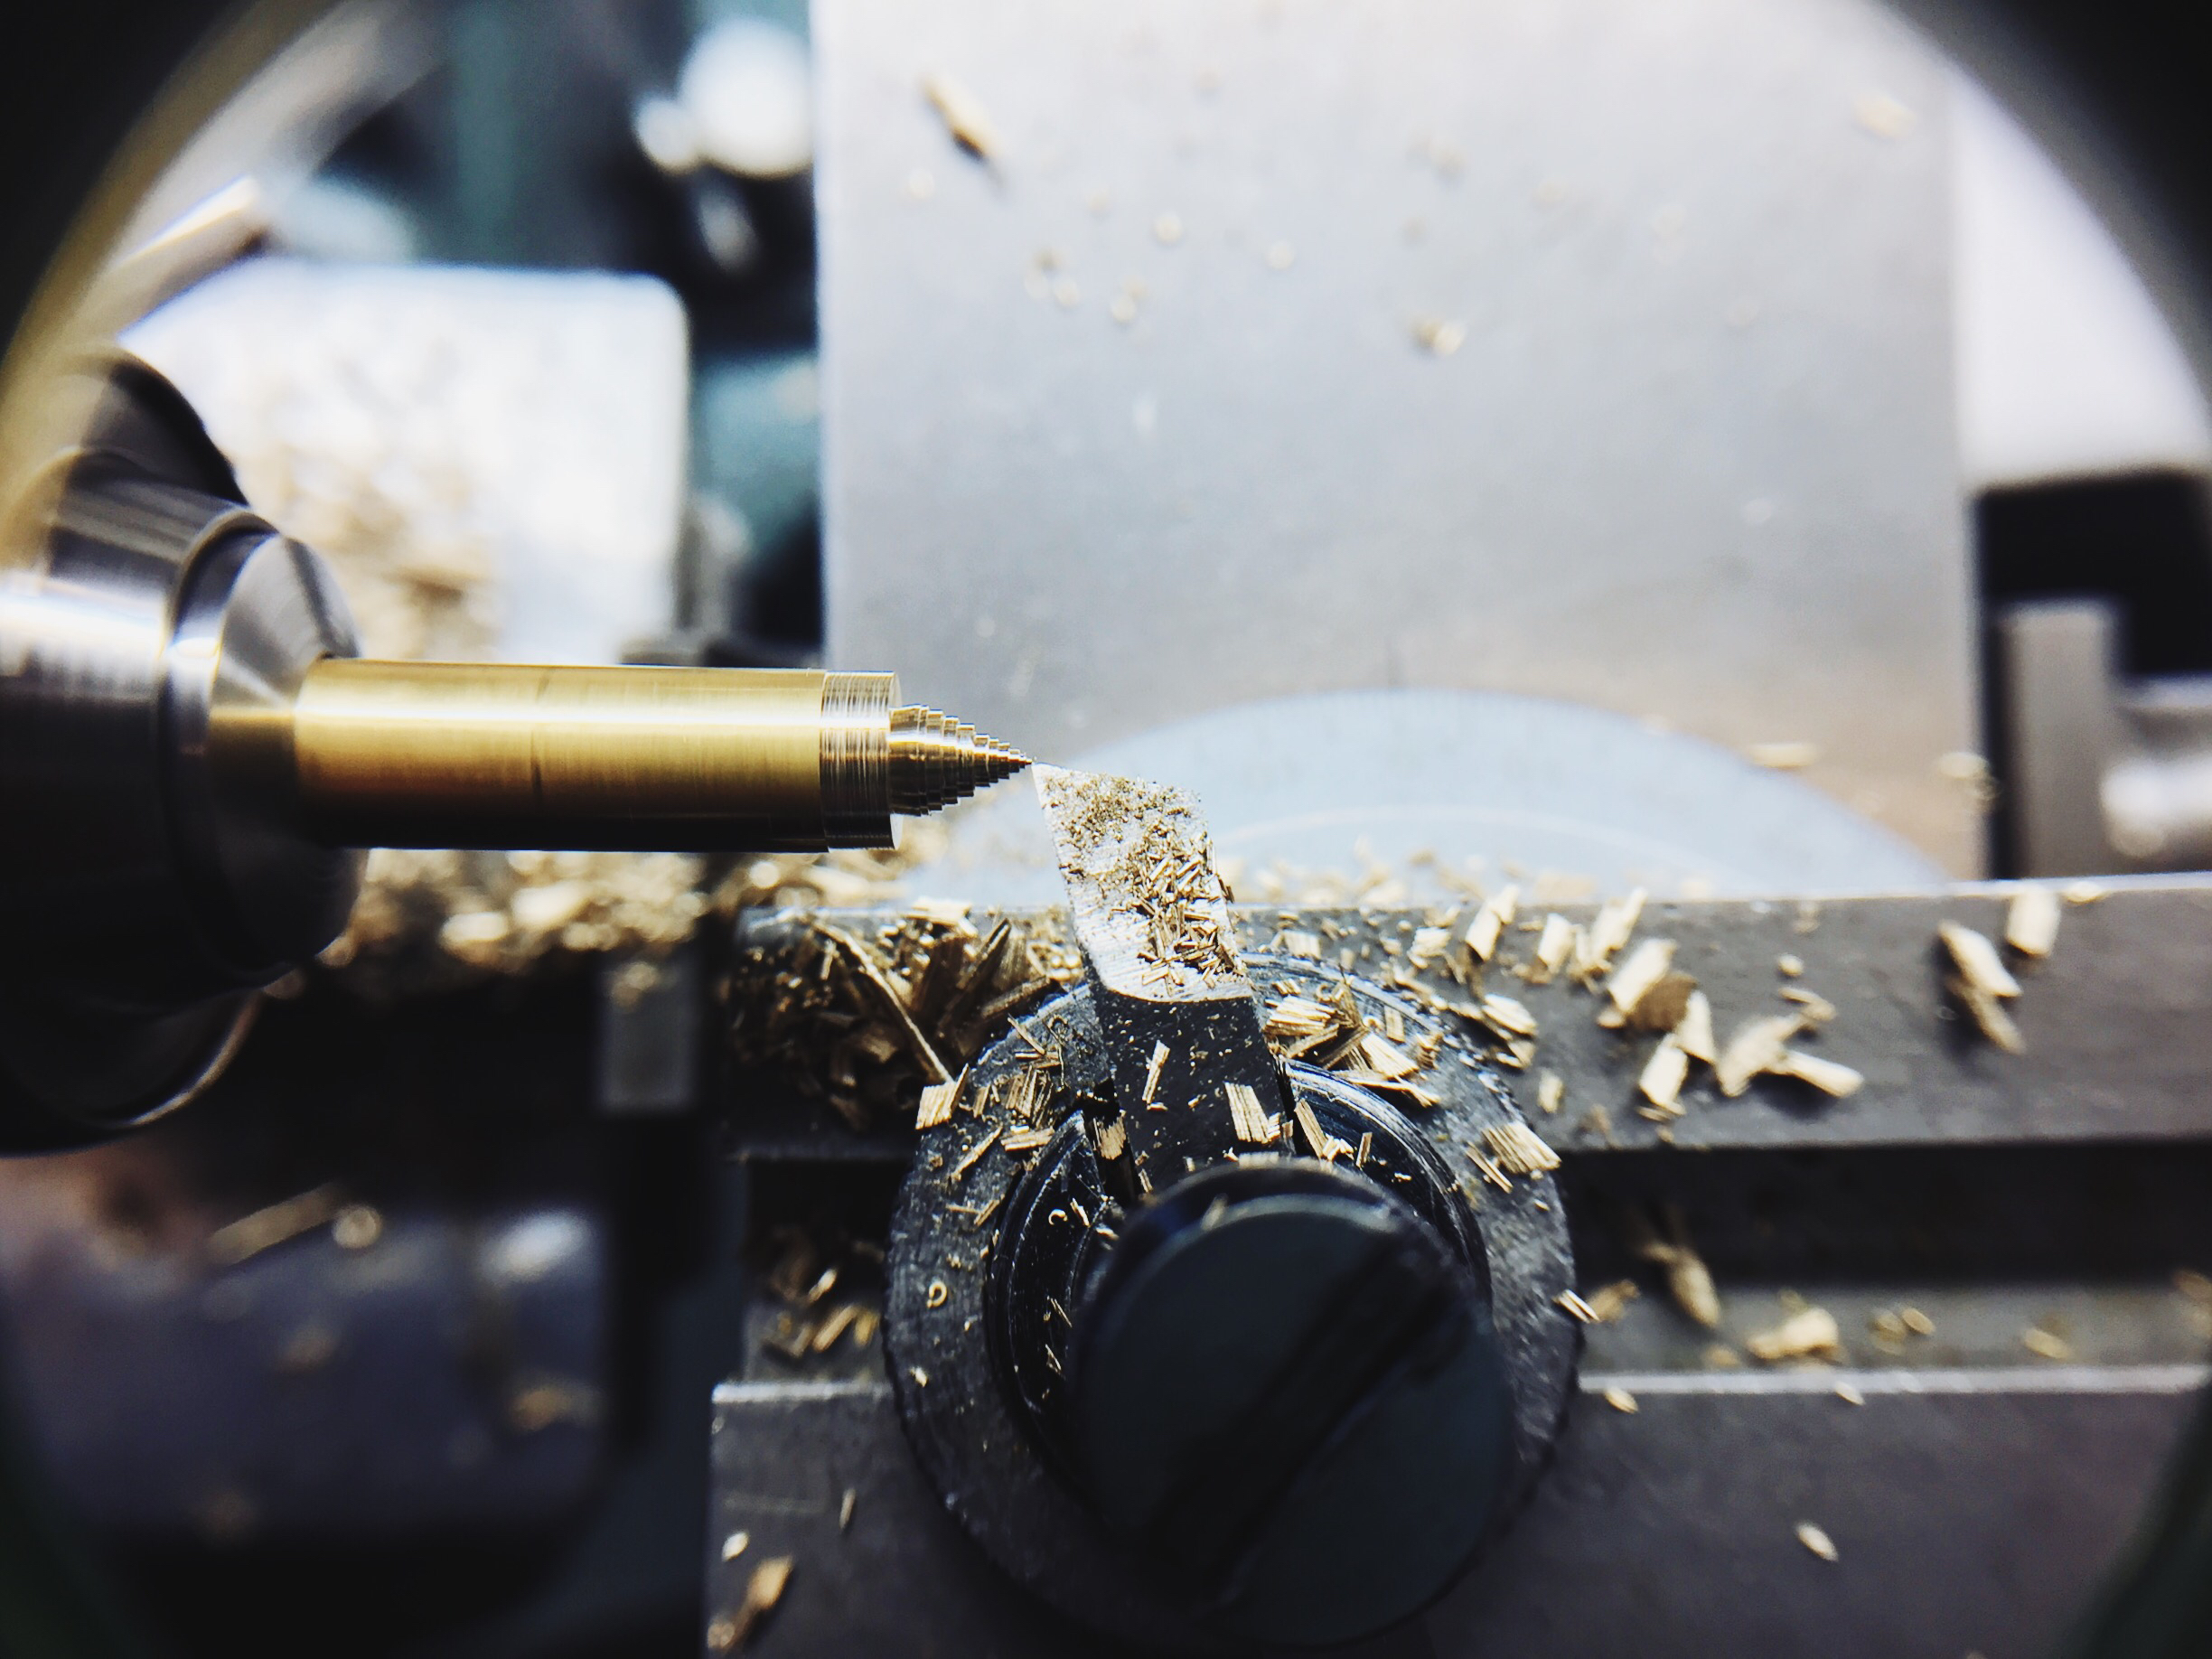
The stem in a 6497 both sets and winds the watch, and it serves as the interaction point between the user and the movement. Winding the mainspring takes tremendous torque, so the stem must be precisely formed—or else it will snap like a twig.

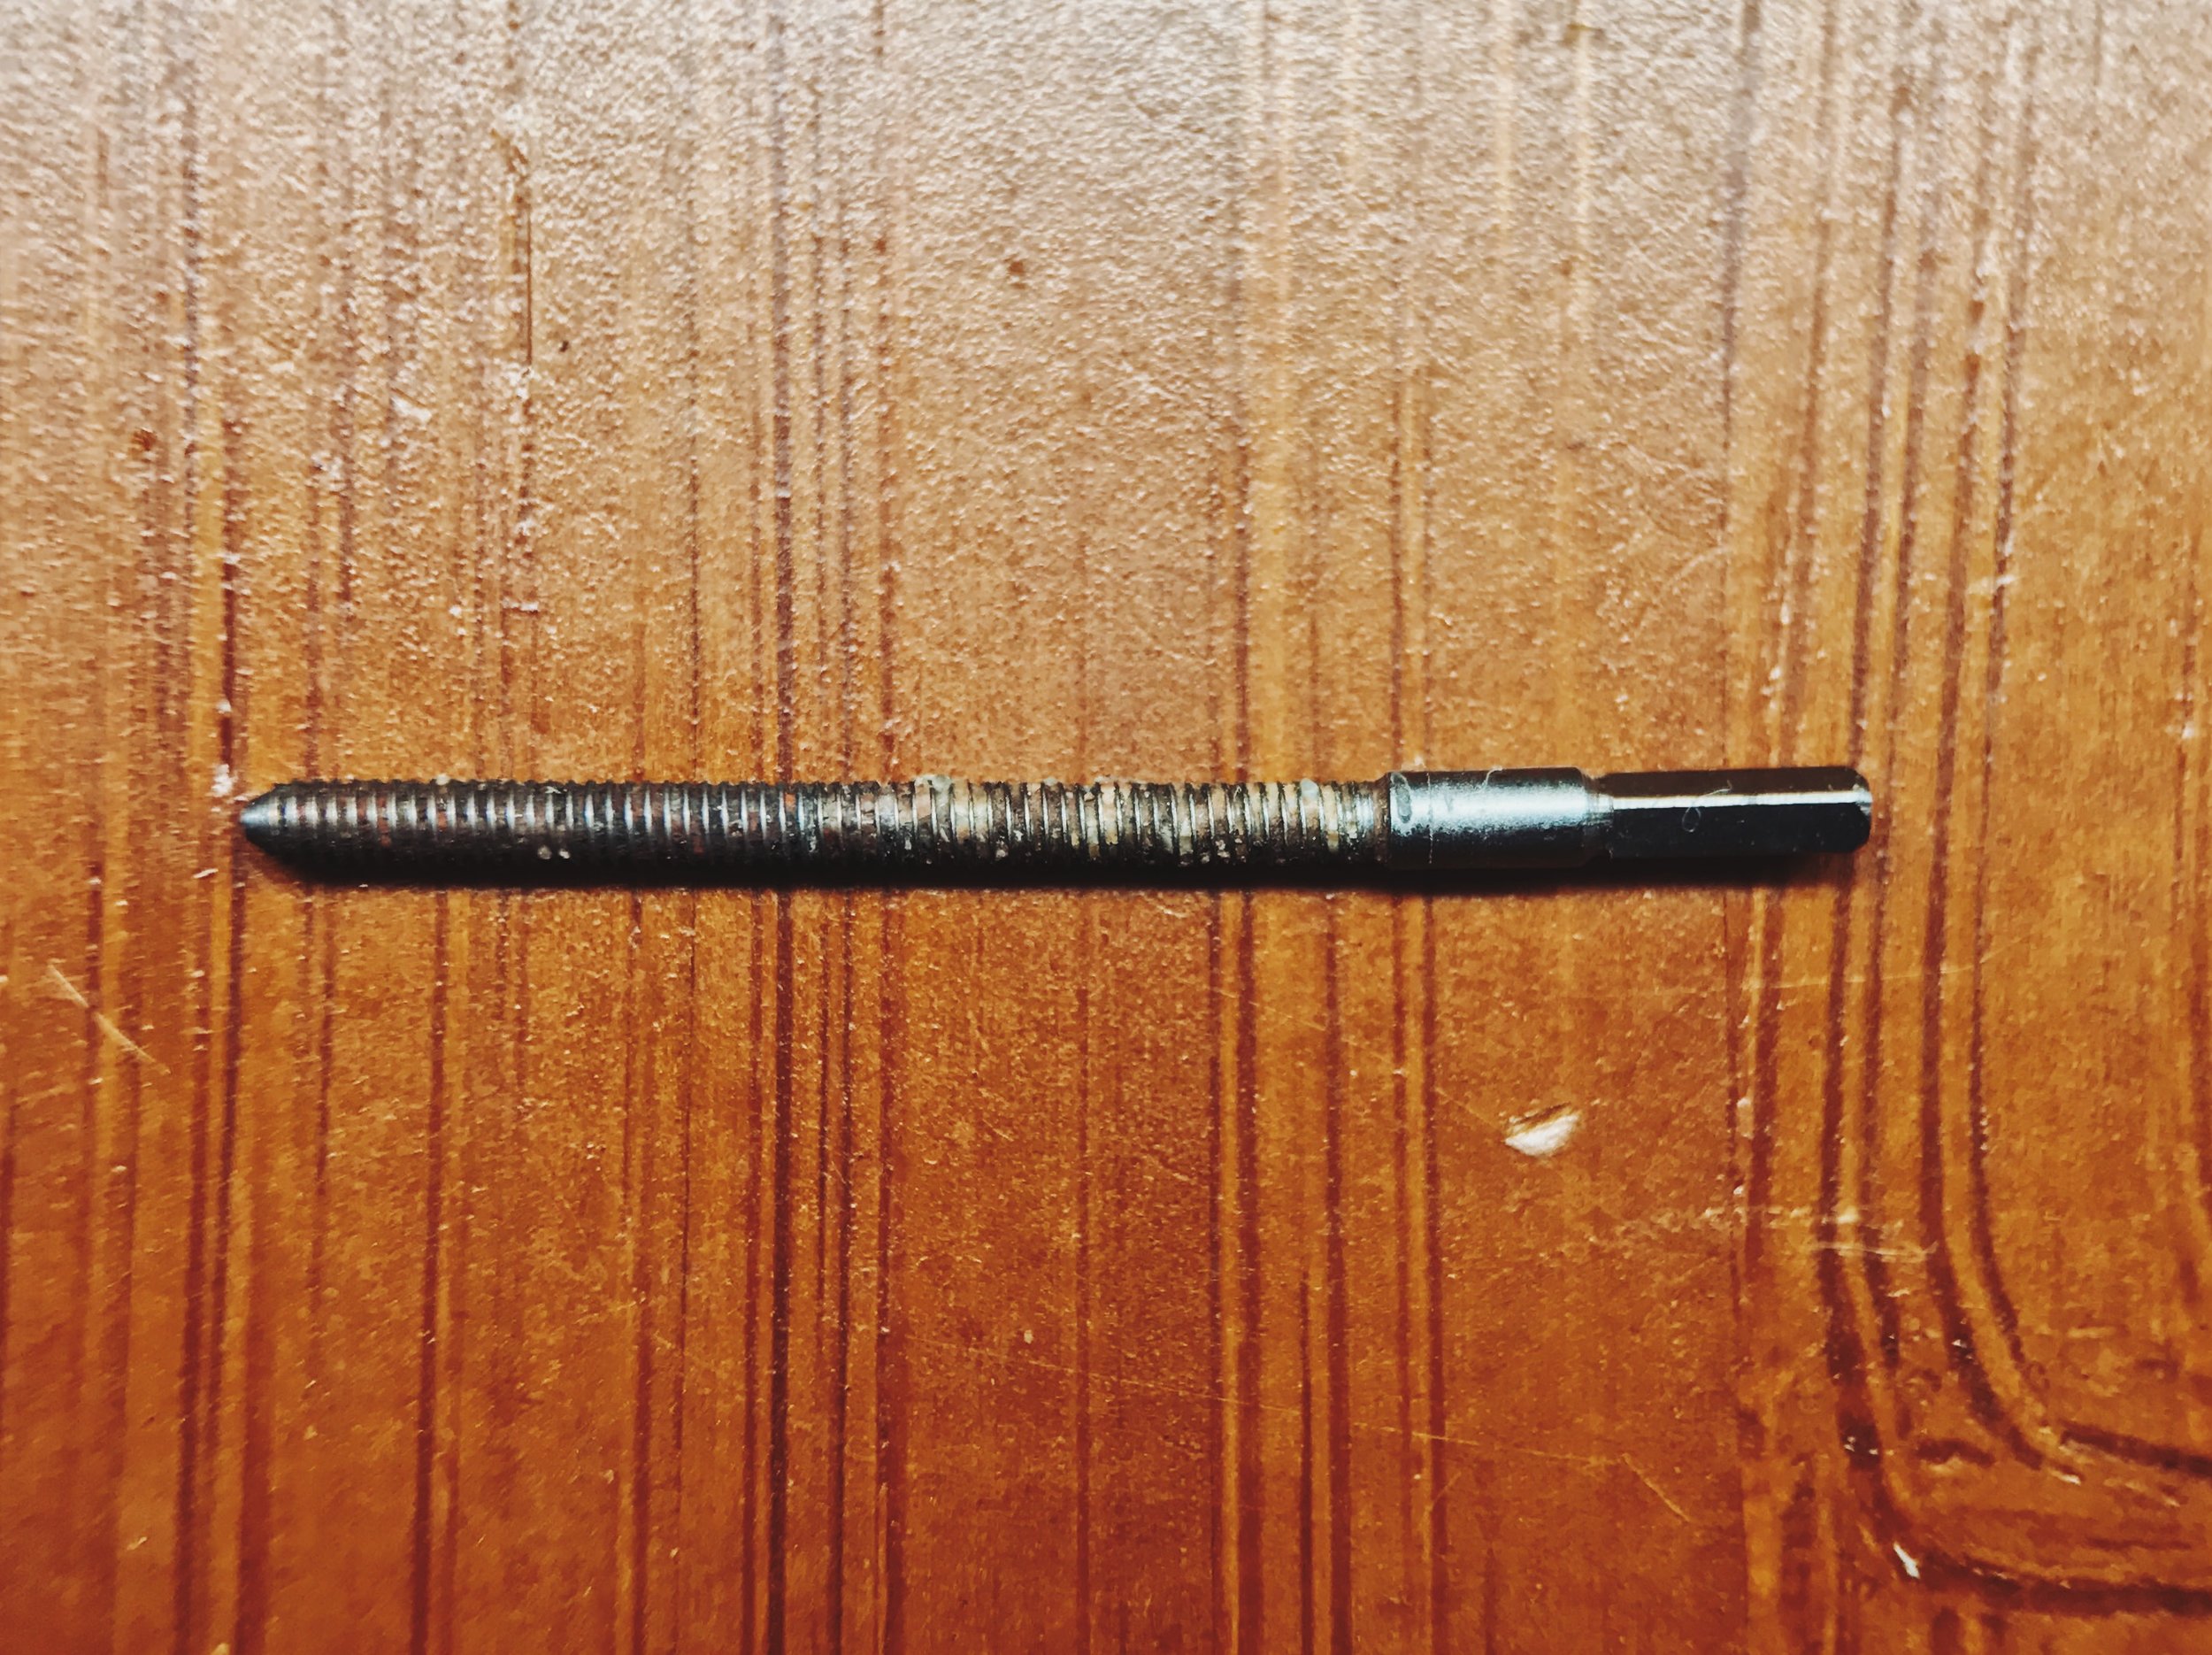
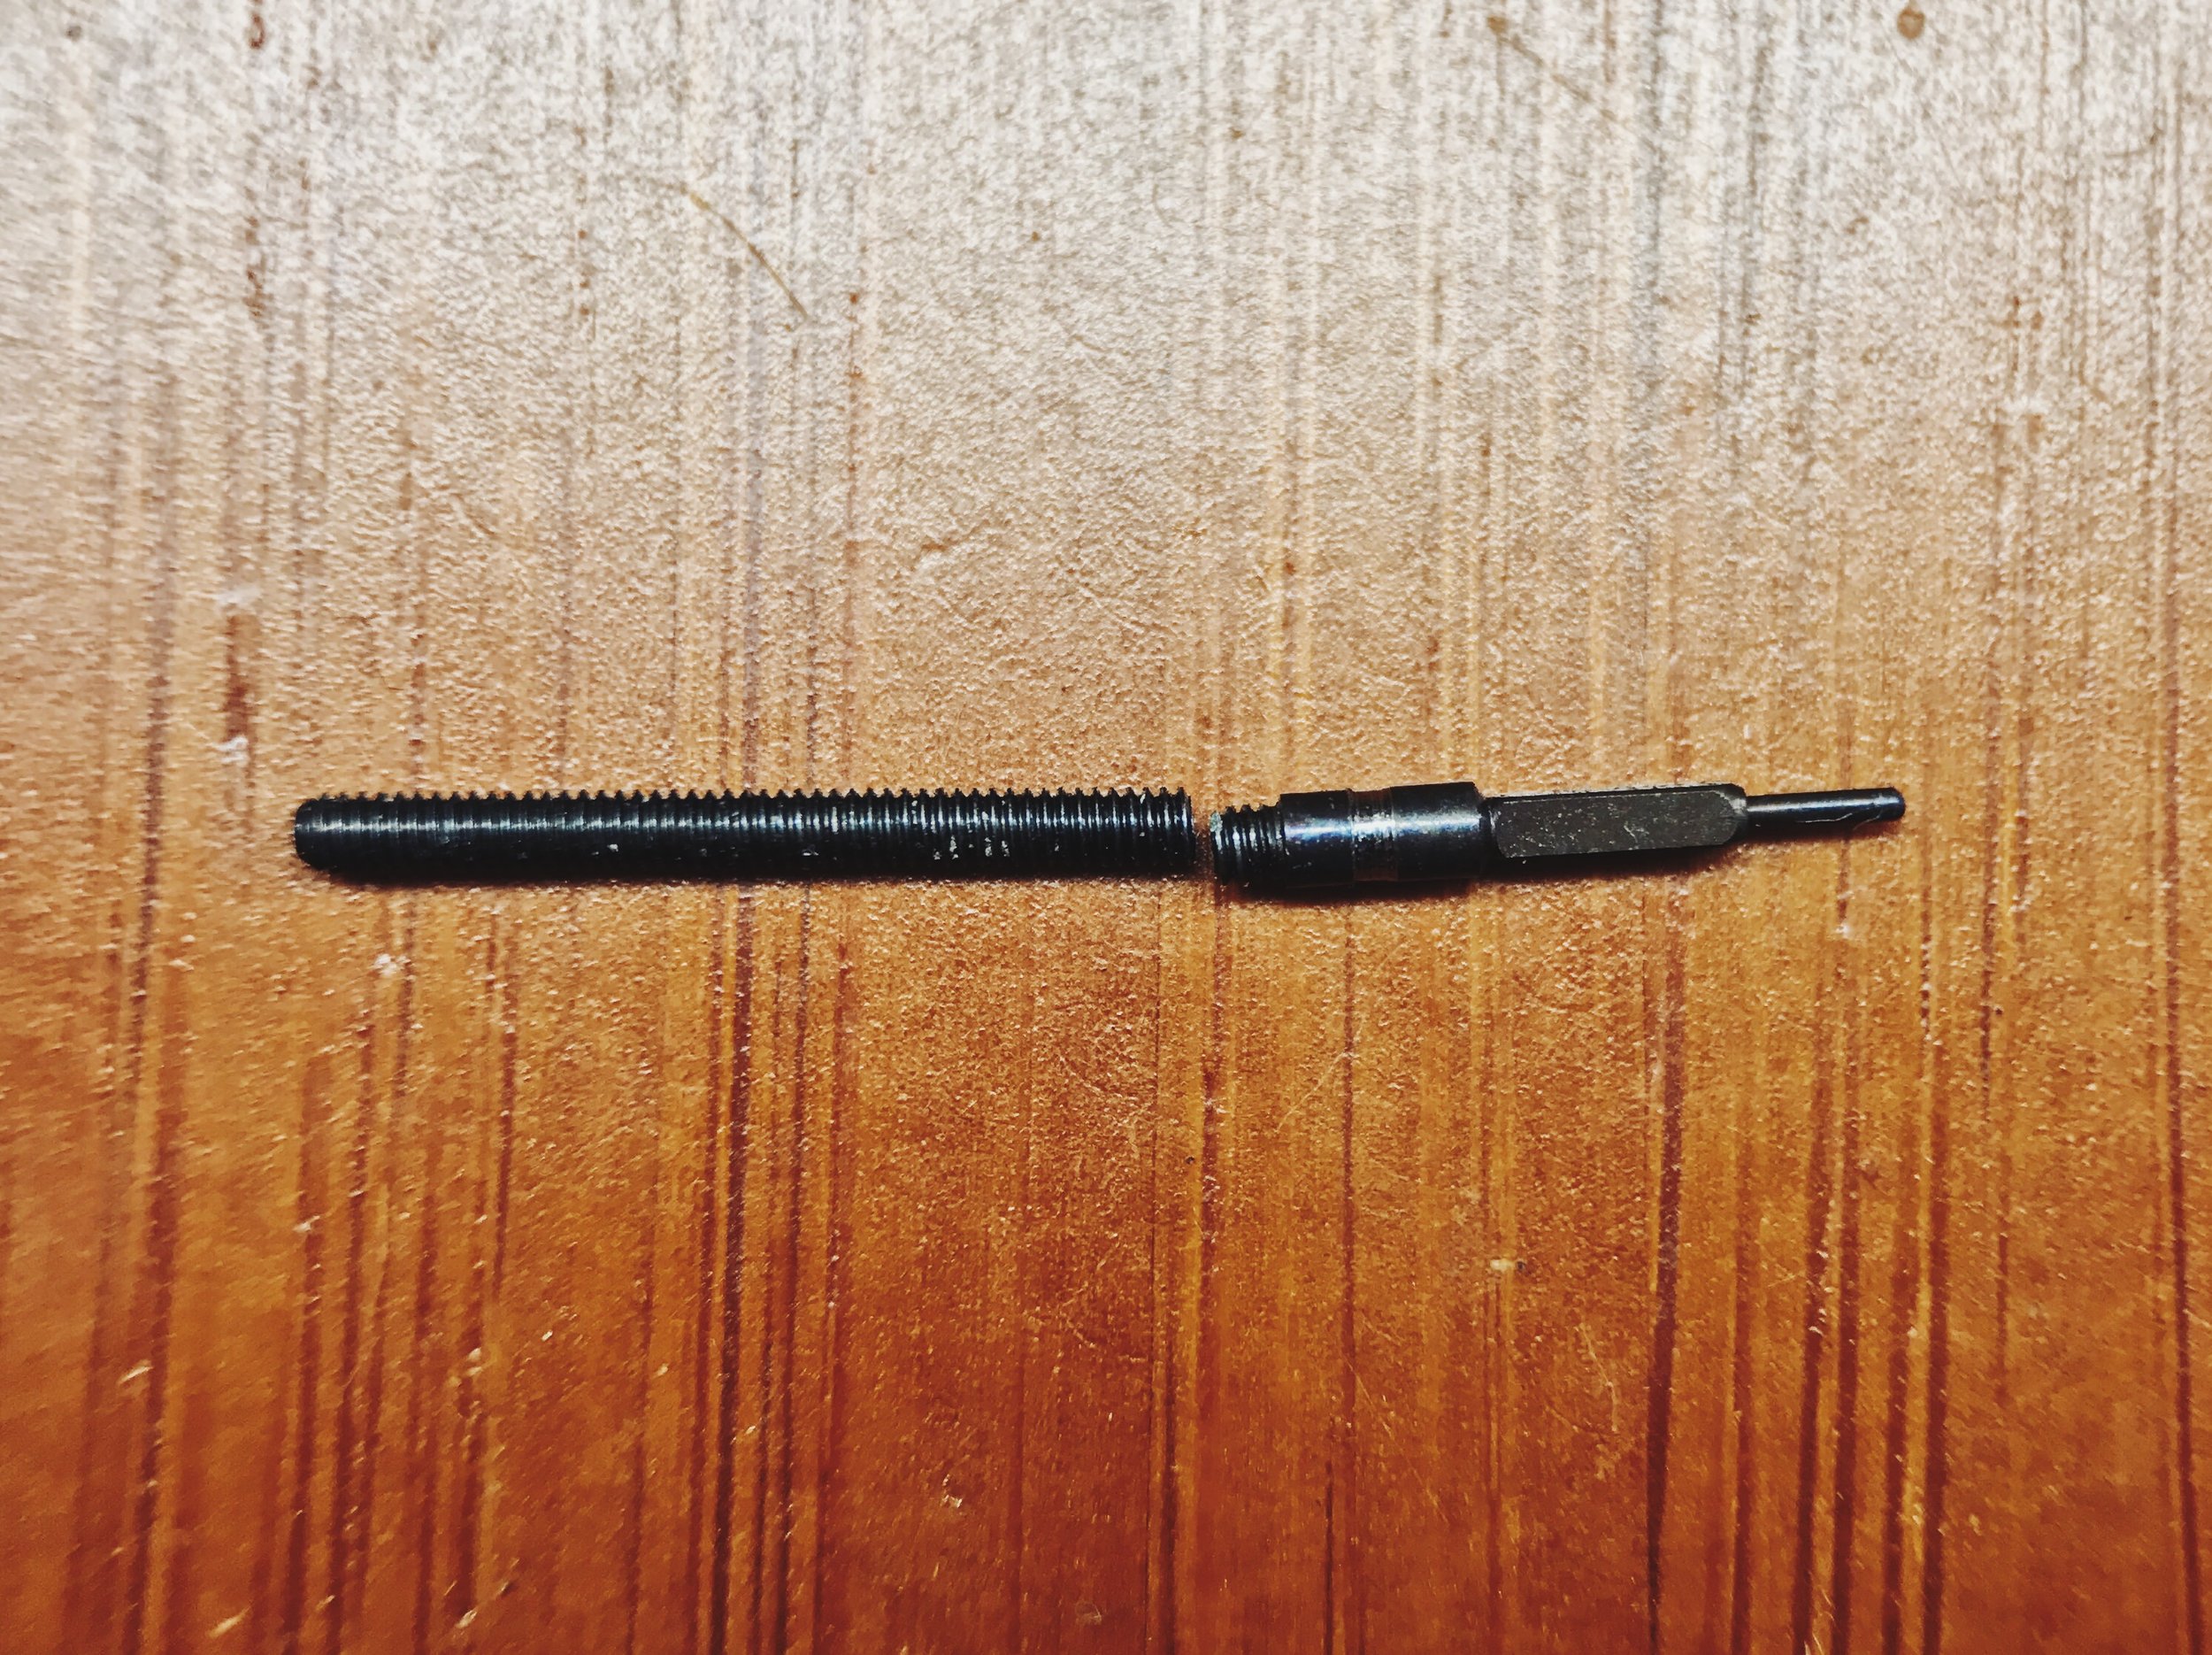
Stems have seven main components:
- Starting from the left in the photo above is the threaded length, which reaches out of the watch and allows a crown to be screwed on.
- Next is the plate bearing, which stabilizes the stem in the mainplate during use.
- The slot is next, which contains the set lever, allowing the stem to index between positions, and which limits the stem's axial travel.
- Following the slot is the winding pinion bearing, which gives a smooth and strong shoulder for the winding pinion to ride upon.
- Second to last is the square, which transmits power to the sliding pinion, but allows it to move freely along its axis.
- Last is the pilot, which bears in the mainplate and locates the entire piece radially.
That's a lot of functionality for a little piece! As you'll see, it was tricky to make.
The main difficulties of this project are cutting the slot, filing the square and heat treating the piece. Slot cutting imparts a huge amount of radial force to the workpiece, easily snapping something small. Heat treating a long, thin object like this can cause severe warpage, as uneven cooling twists the whole stem like a noodle.

Filing a square is a classic watchmaking skill that we have practiced, but not perfected—and definitely not on this small of a scale.

The roller rest on our lathe allows us to file precise flats, but the thin steel likes to bend downwards under the force of the file, leading to tricky tapers. I found that supporting the pilot in the tailstock (not pictured) helped tremendously.

I'd like to pretend that I nailed this project on the first try, but that would be intensely dishonest. In reality, it took six attempts to get this right. Let's look at all six to see what lessons can be learned from each.
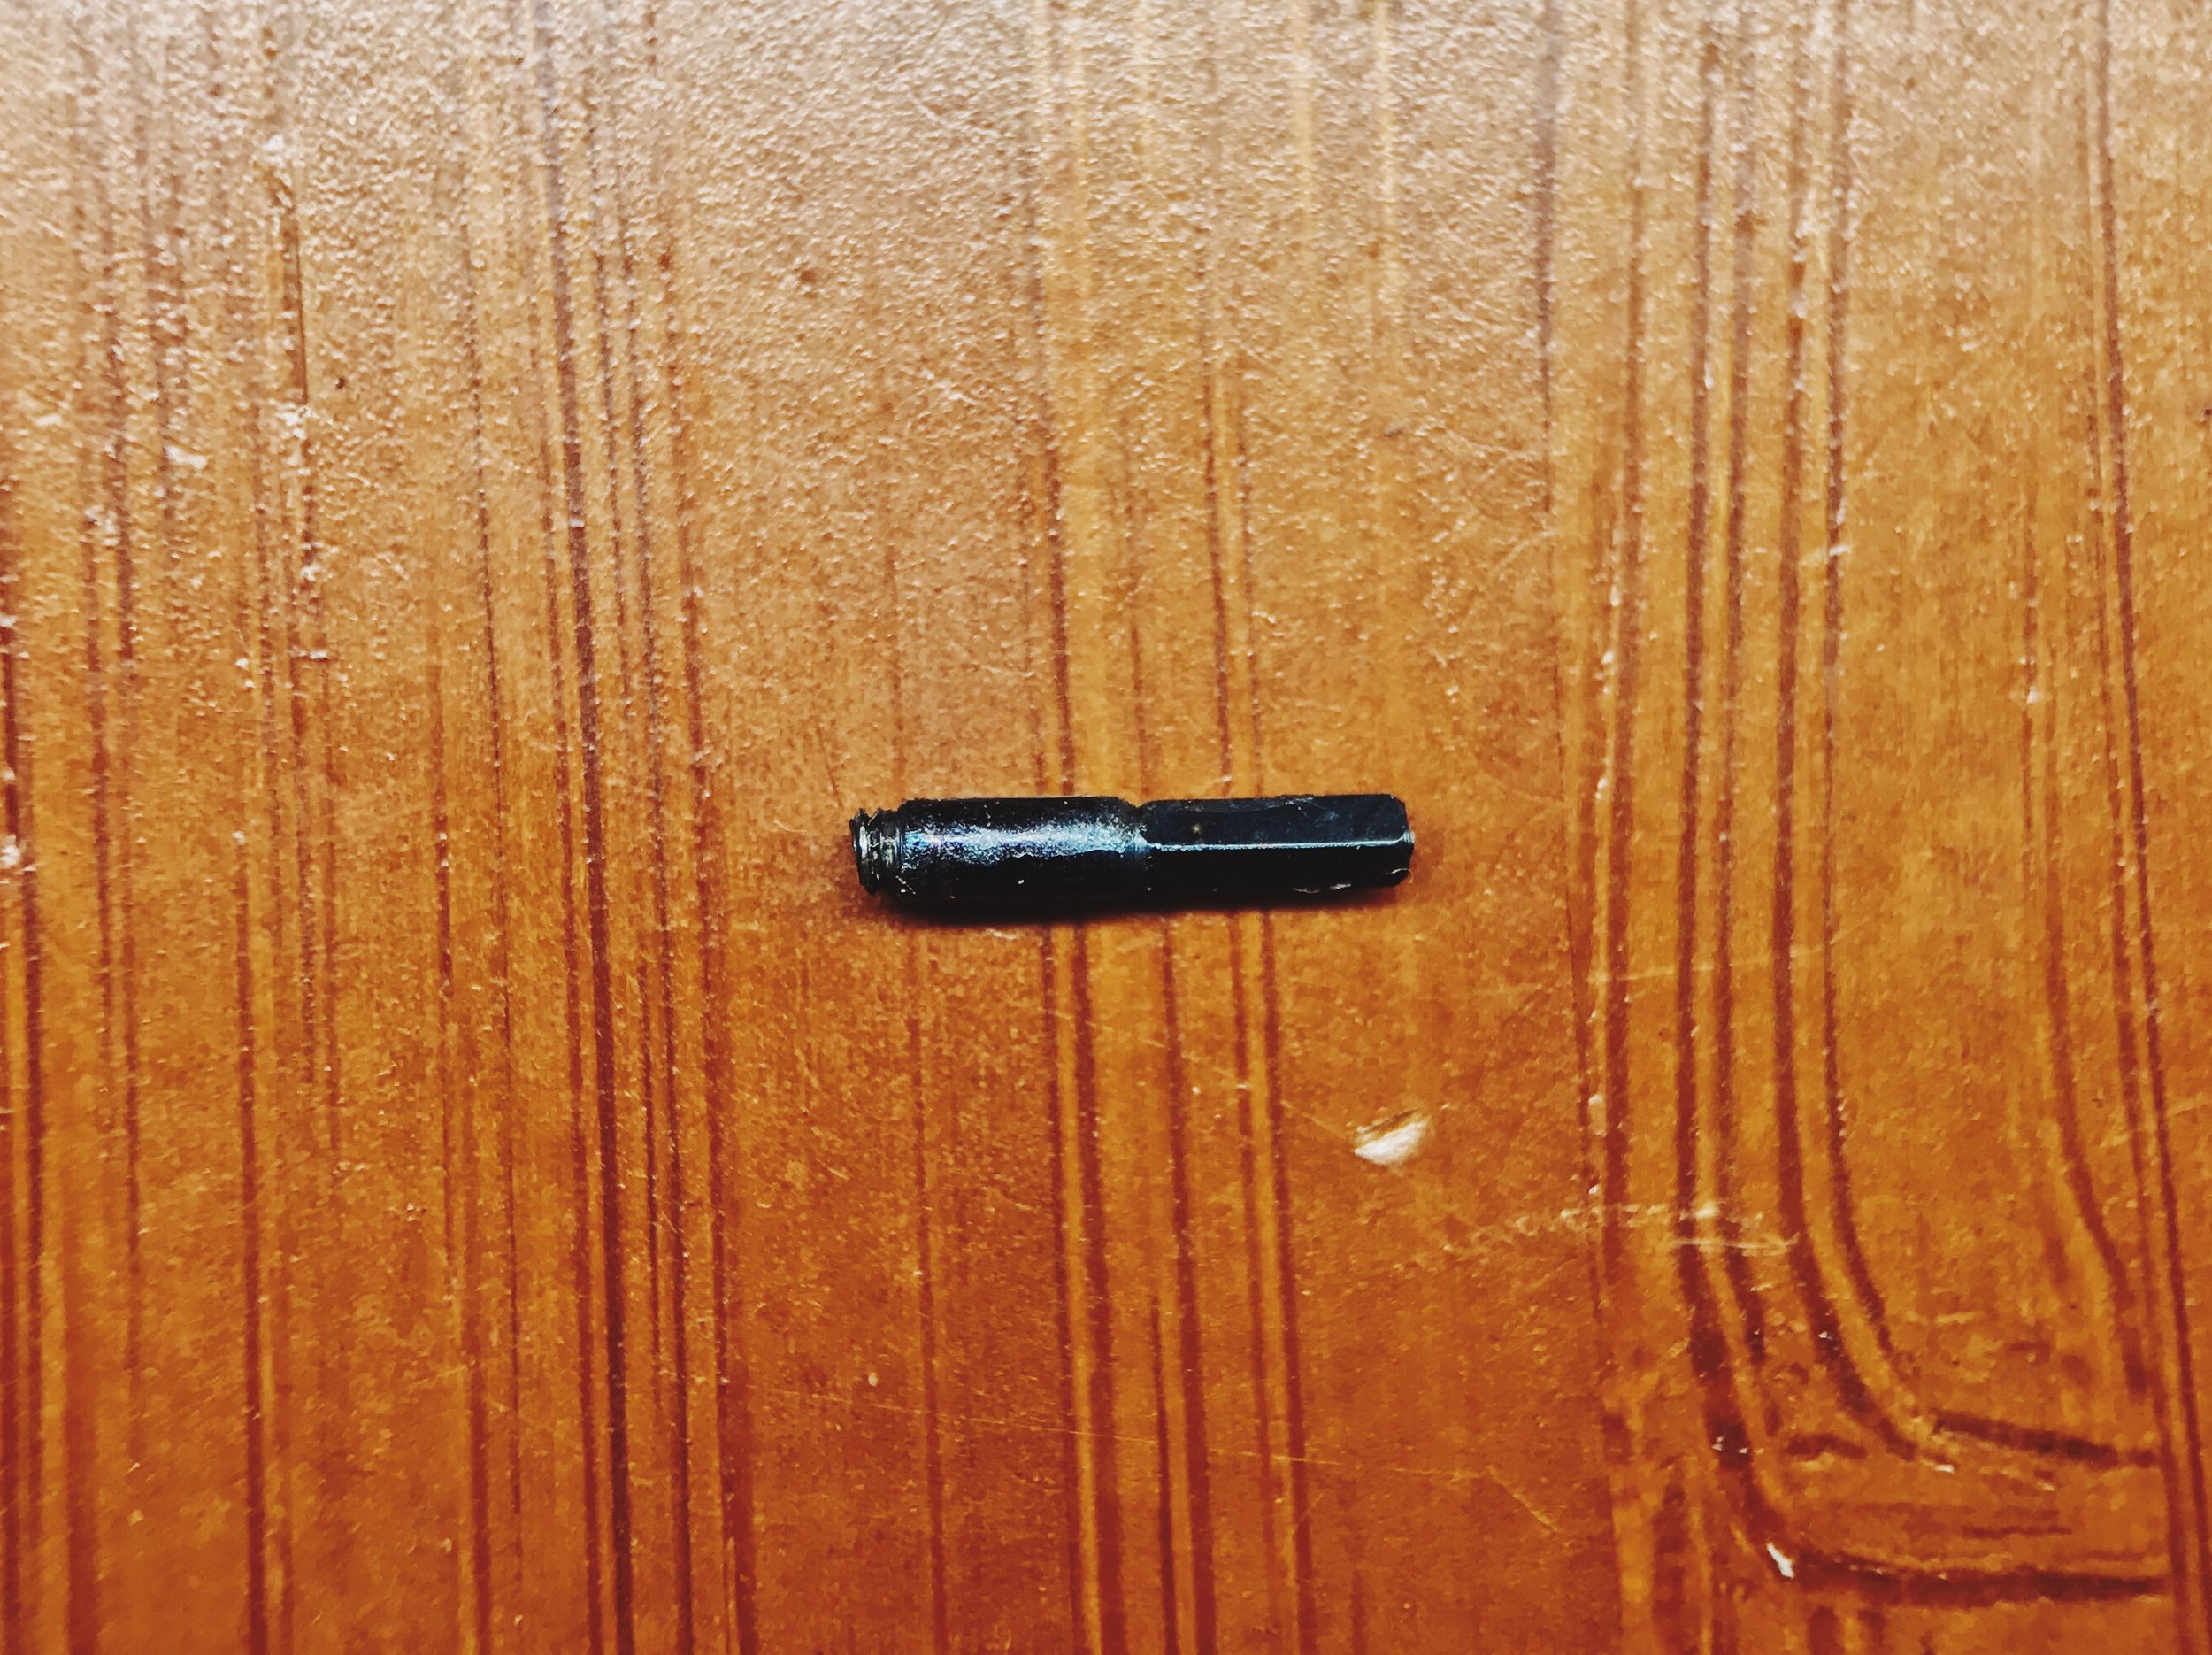
1) Heat-treated metal is brittle. I formed most of this stem fairly quickly, hoping to cut the slot last. Before tempering, I tried to brush some hardening debris from the threads, and used too much force. SNAP! The hardened metal is as brittle as glass, and proved it to me. This remnant was later used as a blueing gauge, hence its color.
2) Heat treatment warps stems like it's nobody's business. Even making a cocoon of binding wire to hold the stem steady didn't help... This piece came out looking like a banana (and the brittle pilot broke off in the wire, too).

3) The slot is very weak. Thread cutting involves some pretty strong torsional forces, and that's exactly what doomed this stem. This one really bummed me out, since I took a lot of time with the square (it might have been my best of all six), but it was a good learning experience. Cutting the slot before the threading is just asking for trouble, because if the bearings don't perfectly match sizes, the twisting force can overwhelm the strength of the slot and break it apart.
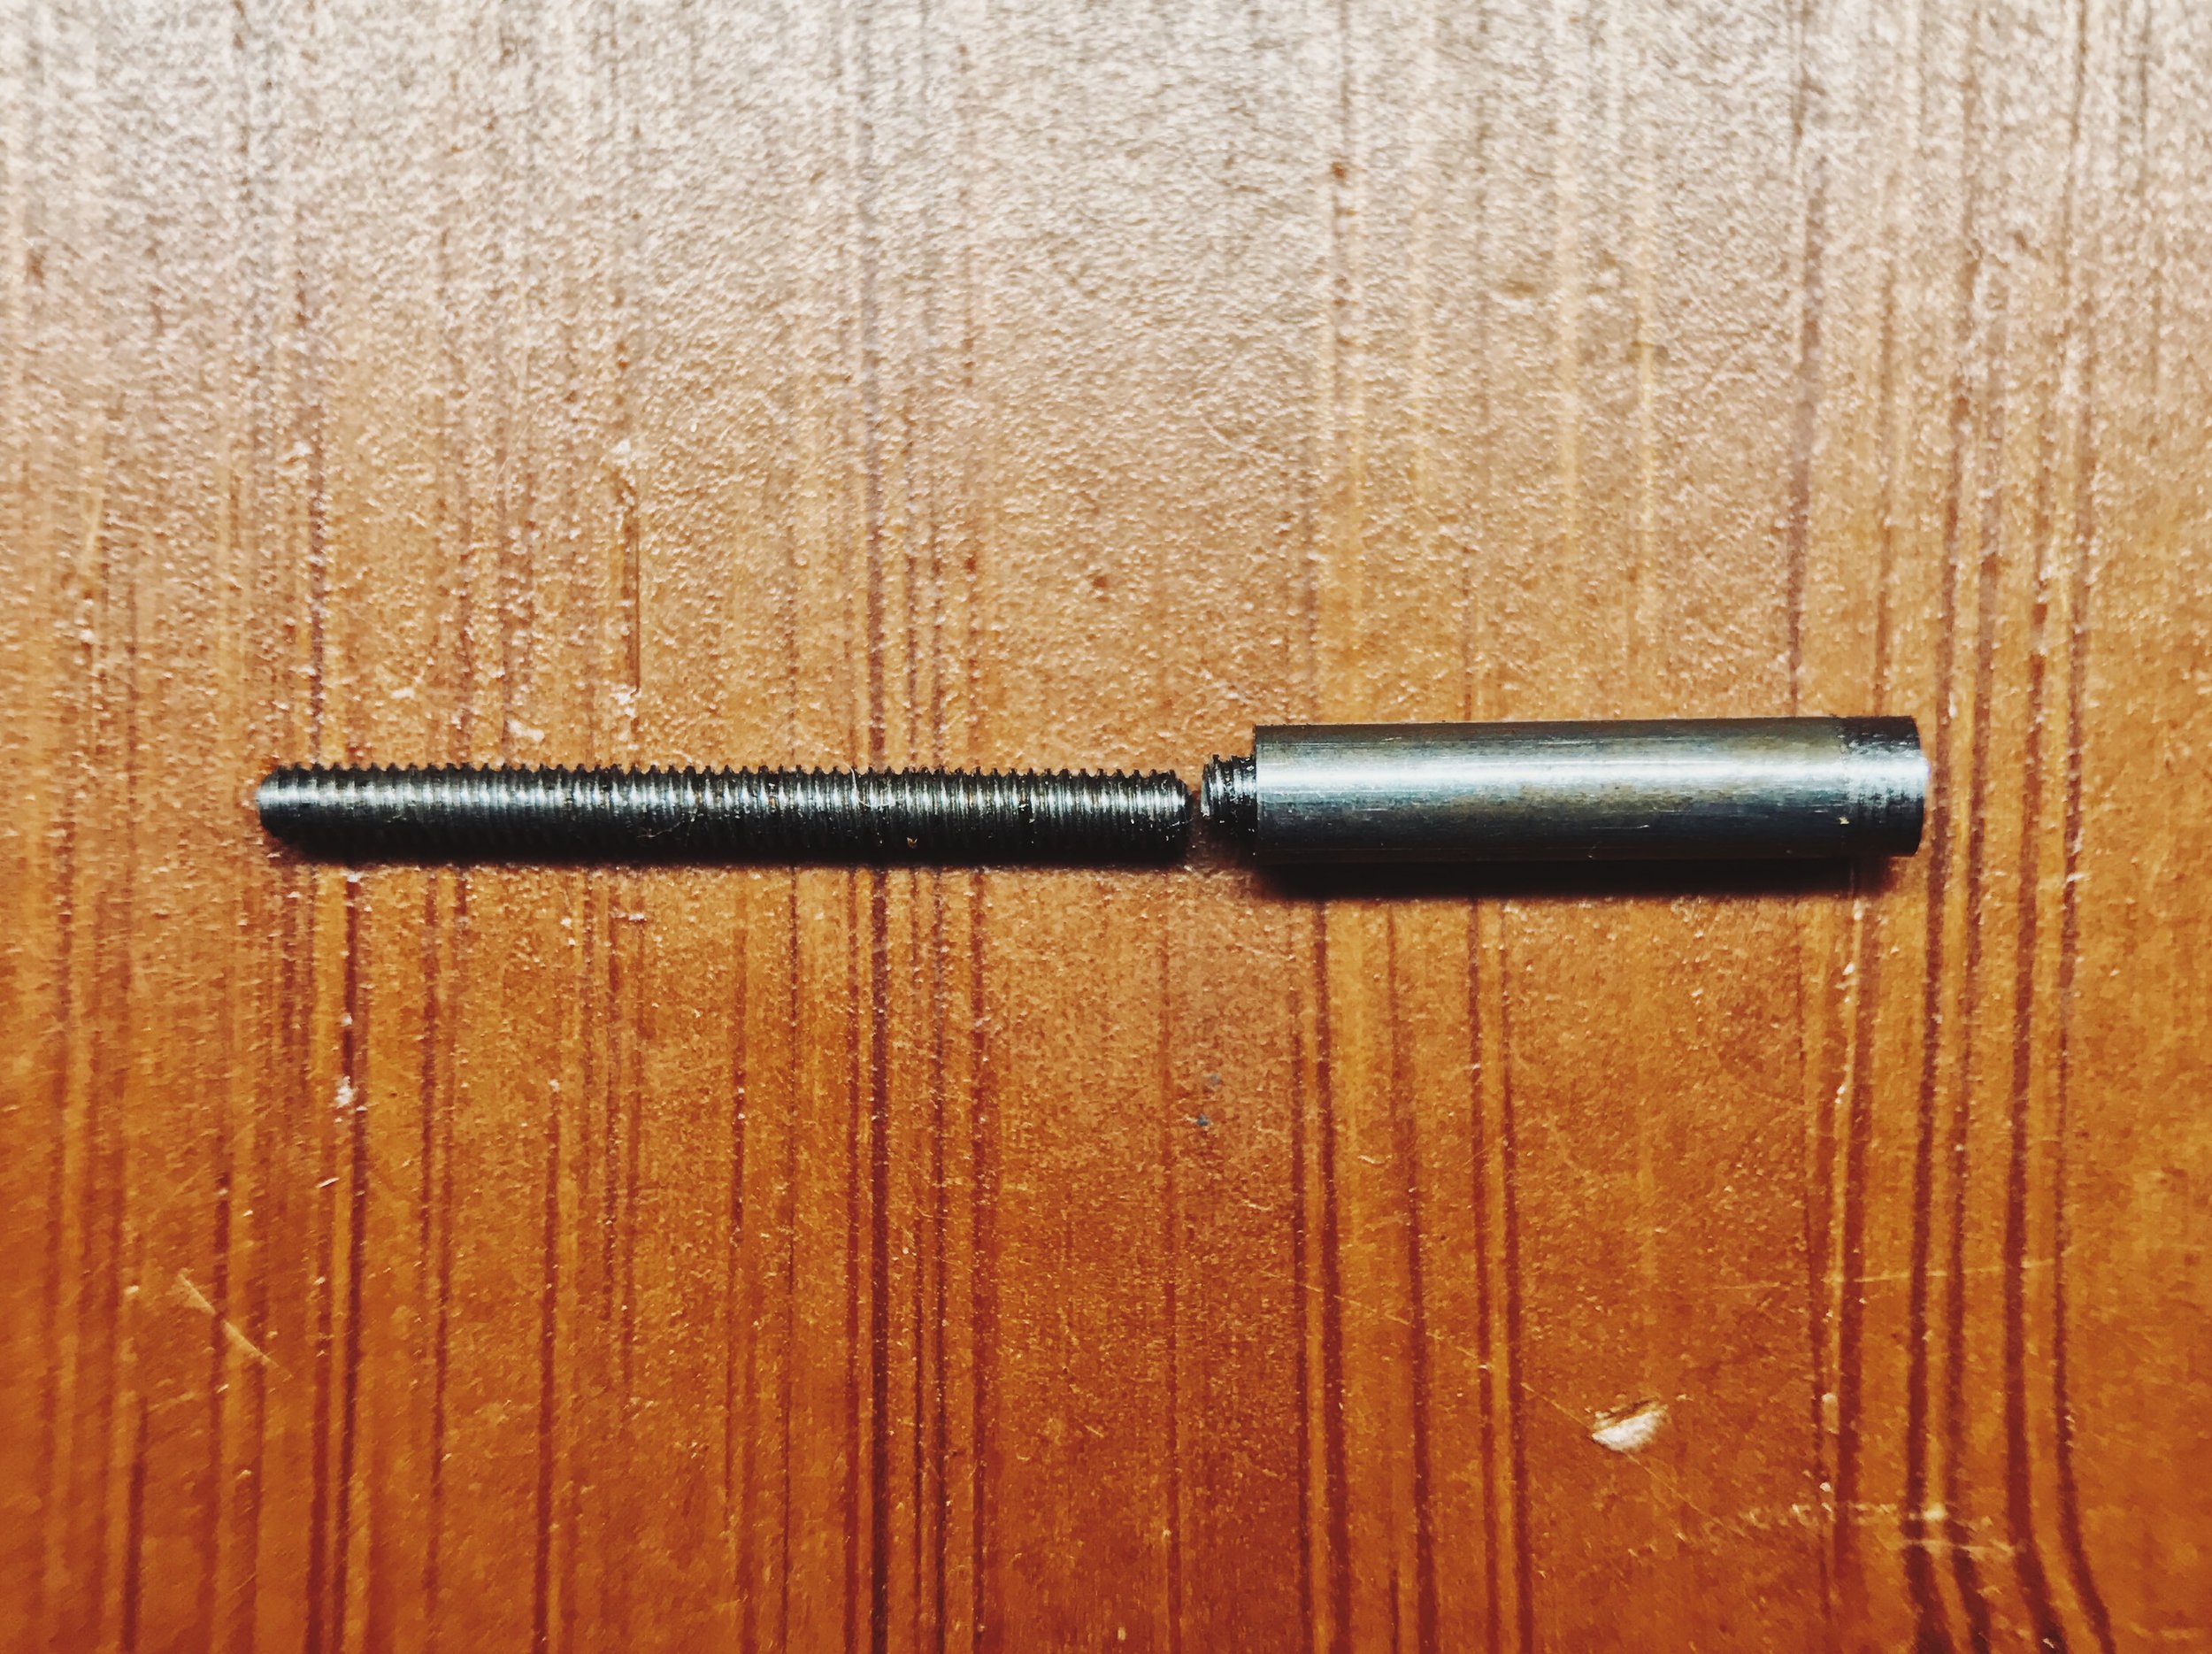
4) Don't overdo the depth of cut. I cut the M1.2 threads first on this piece, but machined the working end like it was still as strong as the original 2.00 mm stock. It wasn't.
5) Cut the slot before heat treatment. Cutting the slot after hardening and tempering has the advantage of eliminating the slot clean-up step, but blued steel is hard and nasty to slot cutters. The radial forces were just too much for the threads to handle (again).

6) Do it all right, and you'll have a stem. For this one, I cut the threads first, turned the piece around in the collet, gently cut the rest of it (including the slot), hardened in a hardening tube (which prevents distortion) and carefully finished it after blueing to remove the color and scale. Refinishing the square is extremely tricky, since the flats of the square have to be re-aligned with the file or lapping film carrier and the roller rest.
One stem doesn't make me a master, but it was definitely satisfying to make one that works with my watch!
Watchmaking student at the Lititz Watch Technicum, formerly a radio and TV newswriter in Chicago.