Escapement Meter: Complete

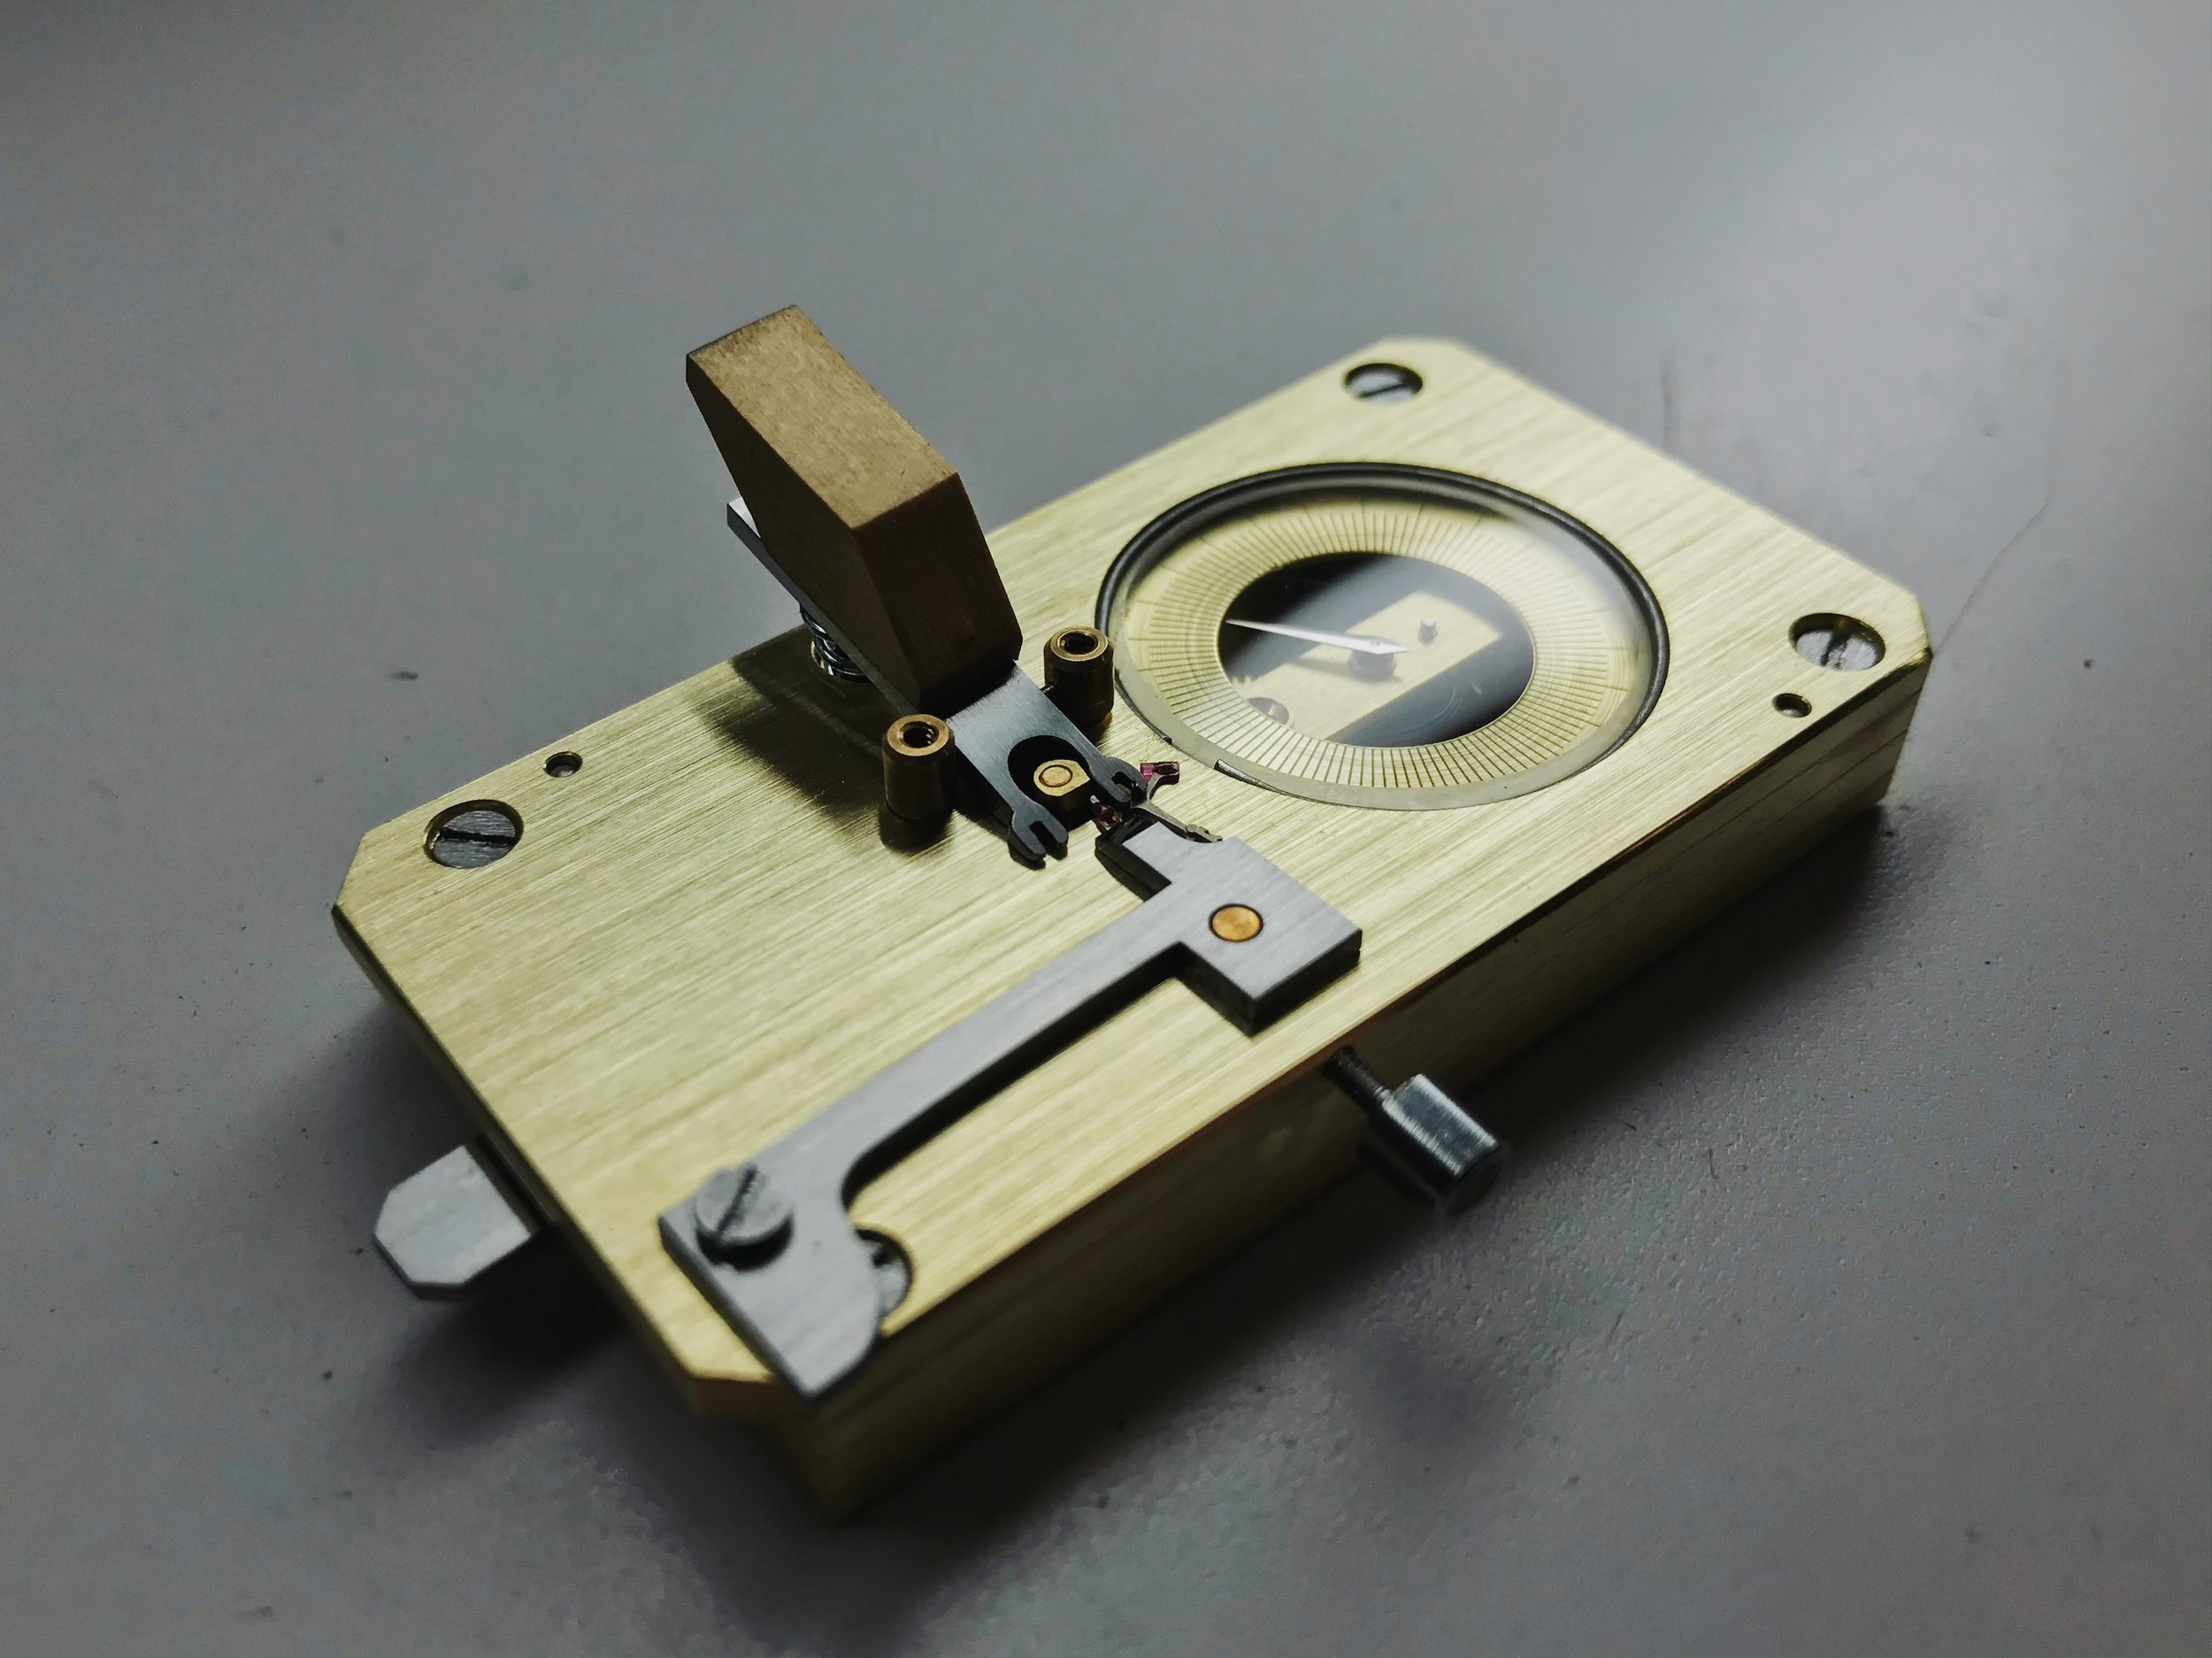
Our capstone micromechanics project is finished… and most importantly, working!
The escapement meter was a huge project, and between the job hunt, internship and exams, completing it before graduation took a concerted effort on everyone’s behalf.
Cutting the dial was the final functional step. There are specialized cutters that can cut dial indices like this, but we used a simple v-groove cutter that extruded the metal up from the inside out. You can see the “eyelashes” that the extrusion process formed around the outside edge, which were very carefully turned away.
The grooves were painted and sanded to make everything nice and visible. The through-hole size was optional, so I made mine just large enough to see the geartrain jewels. I happened to find a hand that was precisely the right size after the fact, which was pure luck.
Finishing the components was one of the trickiest parts of the process. The rough plates were certainly functional, but horribly ugly. Finished brass looks great, but scratches easily. Balancing the level of finish with the durability required to get everything properly assembled was a challenge.
I decided to use heavier grits of emery paper for the main plates, with lighter grits on the train bridge. A side effect of my silly choice to jewel the geartrain was that I had to remove and reinstall the chatons every time I needed to refinish the bridges. What a pain.
The results aren’t perfect, but they’ll work for me!
Watchmaking student at the Lititz Watch Technicum, formerly a radio and TV newswriter in Chicago.


